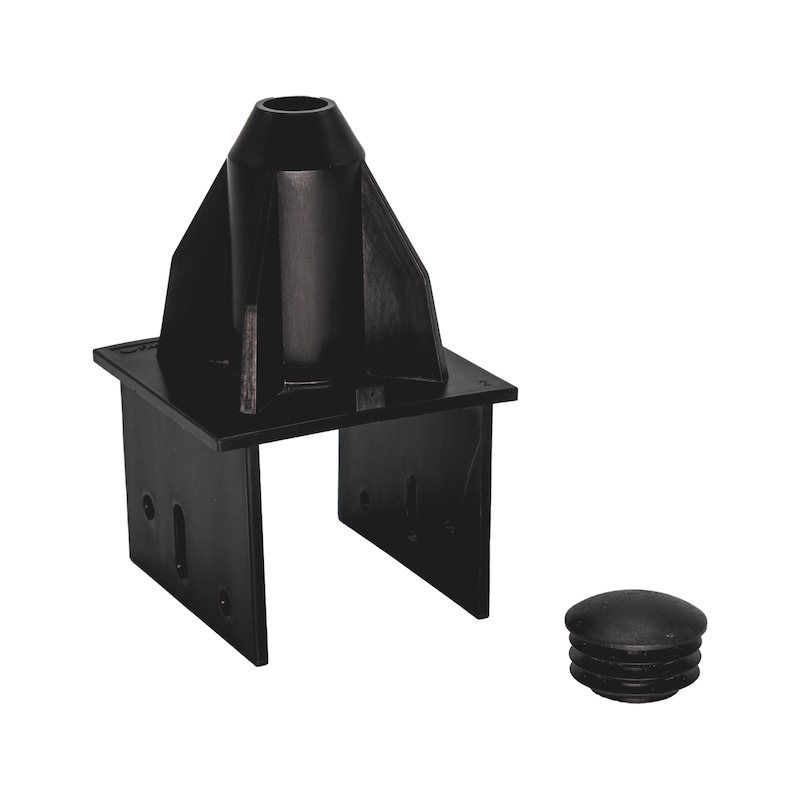
For detailed information, other images and documents, please select individual articles from the following table.
RocketClip Cladding
Durable system that is free from thermal bridges and suitable for closed or partially open façade systems with ventilated dry cladding on pressure-resistant insulating materials
Register now and access more than 125,000 products
Variants
Register now and access more than 125,000 products
Flexible handling
- The wooden battens can be mounted both horizontally and vertically in the clips
System free from thermal bridges
Suitable for almost all types of surfaces
- CLT in combination with Assy® combi with repair washer
- Concrete, calcium silicate block, solid and perforated bricks in combination with SHARK® UR F plastic frame anchor
- The substructure must have a load capacity that is sufficient to withstand any loads that may occur
- We recommend using treated wooden battens measuring 44x44 mm
- For cladding weighing over 35 kg per m2, please consult our technical adviser
- All wood used must be at least quality class C18
- Ensure that the surface is flat. Remove anything that is sticking out and/or excess glue or mortar as far as possible
- Maximum height of up to 20 metres above ground level. For greater heights, please consult our technical adviser
- Suitable for mounting on concrete, calcium silicate blocks, ceramic lightweight blocks, solid or perforated bricks and CLT solid wooden walls
- Suitable hard insulation panels with a pressure resistance of 120 kPa or above: EPS, PIR, Resol foam and Gutex Multitherm wooden plates. For other insulation panels, please consult a Würth technical adviser
Number of RocketClips per m²
- A cross-joint is assumed to have a maximum centre-to-centre distance (up to max. 35 kg of cladding per m²) of 600 mm horizontally and 800 mm vertically, if using vertical battens in the RocketClips.
- For a single connection using horizontal battens in RocketClips, we recommend a centre-to-centre distance of 600 mm and spacing of 600 mm
- For cladding weights over 35 kg per m², please consult a Würth technical adviser
Mounting insulation panels and RocketClips
- Always position panels according to the manufacturer's specifications
- Position the insulation panel against the substructure (securing temporarily using adhesive foam is recommended)
- Drill a hole 10 mm in diameter at least 60 mm into the substructure. Choose the appropriate drilling method and type of core drill bit for the surface. A rotary hammer drill should always be used to drill into perforated bricks. Use a hammer or impact drill for solid bricks and concrete. Not applicable for CLT substructures.
- Clean the drill hole (blow out, brush, blow out)
- Push the RocketClip extension into the insulation panel until it cannot go in any further. Use a 20 mm flat drill bit to pre-drill a hole with a depth of 30 mm in the Multitherm wooden plate
- Push the specified SHARK UR® 10 plastic frame anchor into the RocketClip extension (not applicable for CLT)
- Secure the plastic frame anchor to the substructure with a bit extender
- The length of the anchor is the insulation thickness + 20 mm
- The anchor must be inserted at least 50 mm into the substructure
- Tighten the screw until the batten bracket visibly pulls into the insulation
- In accordance with the ETA approval for the SHARK UR® plastic frame anchor, the screw heads must be coated with corrosion protection spray after installation
- Push the plastic plug-in cap supplied into the extension to ensure a watertight and airtight seal
- Where necessary, install Belleville anchors as specified by the insulation panel manufacturer so that the insulation panel is always attached to the façade with a sufficient number of attachment points
Mounting wooden battens
- We recommend using treated wooden battens measuring 44x44 mm of at least quality class C18
- Mount the planed wooden battens in the RocketClips
- The slotted hole serves as a guide to help ensure level installation and is not suitable for mounting battens permanently
- Screw two of the specified stainless steel half round head screws (4x30 mm) into the small holes on each side
Select RAL-colour code
!! NOTE: On-screen visualisation of the colour differs from real colour shade!!


